
This guide explains how to install Jenny Mod on PC and on Android, step by step. On PC, you install Minecraft Java Edition 1.12.2, add the Forge loader, and drop one file into the mods folder. On Android, you import the fan-made Bedrock add-on and switch on both of its packs. The first PC install takes about 10–15 minutes, and the Android install takes around 5 minutes.
One honest note before you start: the original mod was built for Minecraft Java Edition 1.12.2 only. The 1.19.2 and 1.20.1 files are community ports, and there is no official Jenny Mod for Bedrock, Minecraft PE, APK, or iOS. This guide covers the real PC route and the unofficial Android add-on route, so every step below matches a file that actually exists.
There are two ways to install Jenny Mod, and they are not the same thing. On a computer, you install the real mod: the original Java Edition release, with the full character roster. On a phone, you install an unofficial add-on that borrows the idea — fun, but a smaller thing.
This guide walks through both routes, step by step, in the order that actually works. It also covers the errors that stop most people, because almost everyone hits at least one. Read the checklist first, and the whole job takes ten to fifteen minutes on a computer, about five on a phone.
18+ note, before anything else: Standard builds of Jenny Mod are reported to include adult content. This mod is for adults only. Do not install it on any device that children use.
Before You Start — The Two-Minute Checklist
Most failed installs trace back to something on this list, not to the steps themselves. Check each item before you download anything. It is much easier than troubleshooting later.
- Own the right game. The real mod needs a paid copy of Minecraft Java Edition on PC, Mac or Linux. The Microsoft Store version of Minecraft for Windows is Bedrock — it cannot run Java mods, full stop.
- Know your platform. Java route: a computer. Add-on route: an Android phone or tablet running Minecraft Bedrock. There is no third route, whatever other sites promise — more on iOS at the end.
- Back up your worlds. Copy your saves folder somewhere safe before you change anything. On Windows it lives at %appdata%\.minecraft\saves. Thirty seconds now protects months of building.
- Get the file from our download page and nowhere random. A real Java mod file is a single .jar. A real add-on file is a .mcaddon or .mcpack. Anything that arrives as an .exe, an installer, or a “downloader app” is none of those things — delete it.
- Charge and space (phones). Have a few hundred MB free. Imports fail in annoying ways on a nearly full phone.
Part A — Install on PC (Java Edition + Forge)
This is the complete route: the original mod, every character, every feature the guides and videos describe. You will install a loader called Forge, drop one file into one folder, and launch the game. None of it is hard — the trick is doing the steps in order. The steps are identical on Windows 10 and Windows 11; on Mac and Linux only the folder path in Step 5 changes.
Step 1 — Install Minecraft and run it once
Install Minecraft Java Edition from the official launcher and run the game once, all the way to the title screen. This first run matters more than it looks. The game creates the folders that everything else depends on, including the .minecraft folder you will be digging through shortly.
While you are in the launcher, also create or select an installation for version 1.12.2 (Installations → New Installation → pick 1.12.2) and launch it once. The original mod was built for 1.12.2 and only 1.12.2. A newer Minecraft version will not run it, whatever a download page promised you.
Step 2 — Download Forge 1.12.2
Go to the official Forge website — files.minecraftforge.net — and find Minecraft 1.12.2 in the version list. Download the Installer (the “Recommended” build is the sensible choice). Save it somewhere you can find it, like your Downloads folder.
Two warnings that will save you real grief. First, that site has big advertising buttons that look like download buttons; the real one is the modest link labelled Installer. Second, never download “Forge” from a mod site, a video description, or a file host — fake Forge installers are one of the oldest malware tricks in Minecraft.
Step 3 — Run the Forge installer
Double-click the Forge installer file you downloaded. A small window opens: make sure “Install client” is selected, leave the path as it is, and click OK. The installer does its work in under a minute and tells you when it has finished successfully.
If double-clicking the file does nothing, or Windows asks which program should open it, your computer has no Java runtime installed (or the file association is broken). That is the single most common Forge problem, and it is not your fault. Install Java from java.com, then double-click the installer again — the Forge installer is itself a Java program, so Java has to exist first.
When it finishes, open the Minecraft launcher. You should see a new profile or installation named Forge (or forge-1.12.2). If it is not in the list, check under Installations — it sometimes hides there until selected.
Step 4 — Launch the Forge profile once
Select the Forge profile and click Play. Let the game reach the title screen, then close it again. Do not skip this and go hunting for a mods folder first.
Forge creates the mods folder the first time it runs. If you go looking before this launch, the folder simply is not there, and creating random folders in the wrong place is how files get lost. One launch, thirty seconds, folder exists — now you can add the mod.
Step 5 — Find your mods folder
With the game closed, open the mods folder for your system:
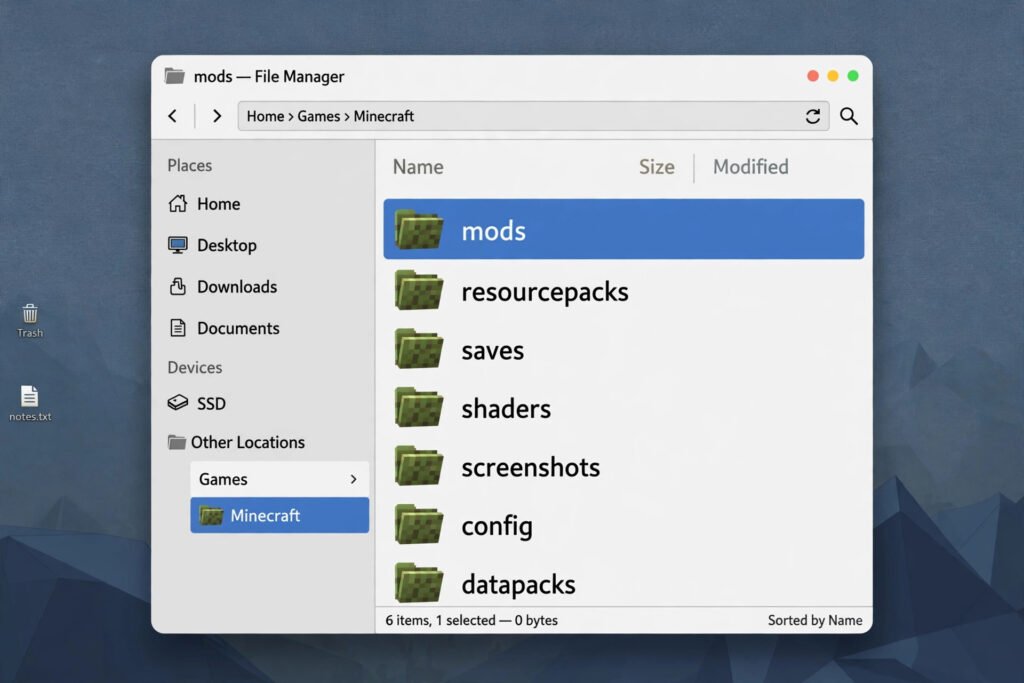
- Windows: press Win + R, type %appdata%\.minecraft and press Enter, then open the mods folder inside.
- Mac: in Finder, choose Go → Go to Folder, and enter ~/Library/Application Support/minecraft — the mods folder is inside.
- Linux: open ~/.minecraft in your home folder (press Ctrl + H if hidden folders are not showing) and open mods.
If there is genuinely no mods folder even after the Forge launch, create one yourself inside .minecraft and name it exactly mods — all lowercase, no spaces. The name has to be exact. A folder called “Mods” or “mod” will be politely ignored by the game forever.
Step 6 — Add the mod file (do not unzip it)
Take the Jenny Mod .jar file from our download page and move it into the mods folder, exactly as it is. Do not open it, extract it, unzip it, or rename it. A .jar that has been unzipped into a pile of folders is a broken mod — Forge reads the sealed file, not the contents.
One file, one folder, nothing else to configure. If the file arrived inside a .zip, the .zip is just packaging: take the .jar out and put only the .jar in mods. Then close the folder and leave the files alone — you are done with them for now.
Step 7 — Launch and check it worked
Launch Minecraft with the Forge profile again. On the title screen, click the Mods button. Jenny Mod should be sitting in the list — that listing is your proof the file loaded.
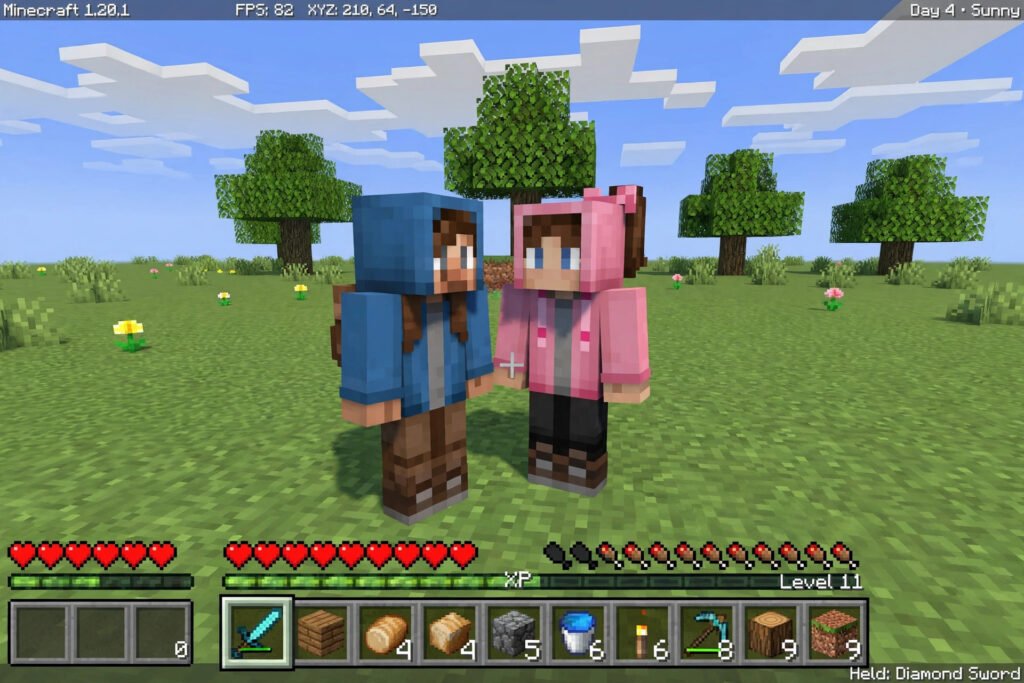
Now make a brand-new Creative world and open the inventory. Search the spawn eggs and you should find the characters’ eggs there, ready to place. Put one down, meet your first companion, and only then think about Survival — testing in a throwaway Creative world is how you find problems without risking a world you care about.
A nice extra, once the basics work: OptiFine pairs well with this setup for better performance and graphics. Install it the Forge way — run the OptiFine 1.12.2 installer, choose Extract, and put the .jar it produces into the same mods folder. Installing OptiFine as its own launcher profile instead makes the two fight, so the Extract route is the one that works alongside Forge.
One more setting is worth knowing about if you stack several mods: memory. In the launcher, open Installations, pick your Forge profile, open More Options, and find the JVM Arguments line that starts with -Xmx. Raising it from -Xmx2G to -Xmx4G gives the game more room, which helps heavy mod lists. There is no single correct number — never give Minecraft more than half of your computer’s total RAM, and for Jenny Mod alone the default is already enough.
Part B — Install on Android (Bedrock Add-On)
The honest version first, because every other site skips it: there is no official Jenny Mod for Bedrock, Minecraft PE, or any phone. There is no APK and no official add-on. Nothing here comes from the mod’s creator. What exists is fan-made add-ons that add a Jenny-style companion to Bedrock — genuinely enjoyable, but with fewer characters and simpler behaviour than the Java original.
If that trade sounds fine, the install itself is quick. Bedrock add-ons need no loader and no folders. You import one file, switch on two packs, and flip one setting.
Step 1 — Download the add-on file
Get the add-on from our download page. The file should end in .mcaddon (both packs bundled) or .mcpack (a single pack). Save it to your Downloads folder where you can find it again in a moment. Before importing, check which Minecraft versions the add-on says it supports, and compare them with the version on your phone — an add-on built for an older game can import cleanly and still do nothing.
Check the ending before anything else. If the file ends in .apk, it is an Android app pretending to be the mod — that is not how Bedrock add-ons work, and it is not safe to install. If it ends in .zip, do not panic: that is just packaging, and Step 2 explains what to do with it.
Step 2 — Import it into Minecraft
Open your file manager, go to Downloads, and tap the .mcaddon or .mcpack file. Choose Open with Minecraft if your phone asks. Minecraft launches by itself and imports the pack — you will see an “import successful” message for the resource pack and the behaviour pack.
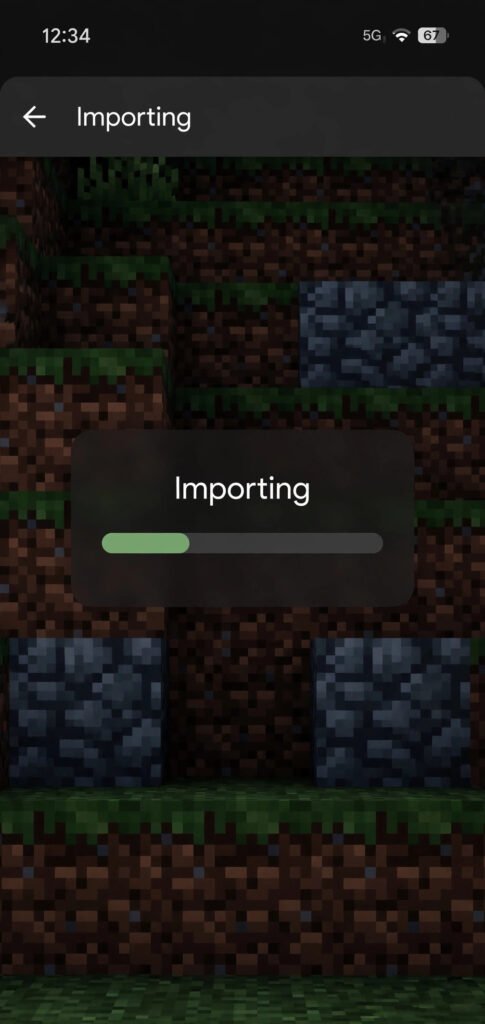
If you downloaded a .zip instead, open it first with your file manager’s extract option (or an app like Files by Google). Inside you will find the .mcpack or .mcaddon files — tap each one and import it the same way. Some browsers also helpfully rename or unzip downloads on their own; if the file in Downloads has a folder icon and no extension you recognise, that is what happened, and extracting is the fix.
If tapping the file does nothing at all, the phone usually has no default app set for that file type. Try a long-press → Open with → Minecraft. Restarting Minecraft (swipe it closed, reopen) fixes the stuck-import cases more often than redownloading does.
Step 3 — Make a test world and activate both packs
Open Minecraft, tap Play → Create New, and make a fresh world — call it something obvious like “Jenny Test.” Testing in a new world means a broken add-on can never touch a world you care about. You can move to a real world later, once you know it works.
In the world’s settings, open Resource Packs → My Packs, find the add-on, and activate it. Then open Behaviour Packs → My Packs and activate it there too. Both halves are required: the resource pack is how she looks, the behaviour pack is how she acts, and half an add-on is just a statue or an error message.
Step 4 — Turn on experimental features
Still in the world settings, scroll down to Experiments and turn on the experimental features the add-on asks for (usually Holiday Creator Features and the general experimental toggles). Minecraft will show a warning that experiments can change or break — that warning is standard for every add-on, not a sign this one is dangerous. Confirm it and carry on.
This is the step everyone skips, and it is per-world: a toggle switched on in one world does nothing for another. If your companion does not appear later, this toggle, in this world, is the first thing to re-check. Most of the time, this toggle is the whole problem.
Step 5 — Find her in the world
Load the world in Creative mode and open your inventory. Search the spawn eggs for the companion’s egg, place it on solid ground, and she should appear in front of you. That moment — egg in the creative inventory, character standing in the world — is the whole install confirmed working.
Happy with her? Edit the world’s settings (the pencil icon next to it) and switch the game mode back to Survival whenever you like. The add-on stays active; only the mode changes. From there she is part of that world until you deactivate the packs.
Common Install Errors and How to Fix Them
Almost every failed Jenny Mod installation comes down to one of these six problems. Find yours, do the fix, and only then consider redownloading — redownloading is usually the one thing that will not help.
The game crashes on startup (Java). This is a version mismatch until proven otherwise. The original mod needs Minecraft 1.12.2, Forge for 1.12.2, and the 1.12.2 mod file — all three, matching exactly. If you added other mods at the same time, remove them and test with Jenny Mod alone; add the others back one at a time to find the troublemaker.
Jenny Mod is not in the Mods list (Java). Three usual causes cover almost every case: the .jar is not directly inside the mods folder (check for a folder-inside-a-folder from unzipping), the wrong profile was launched, or the browser renamed the file. The wrong-profile cause is the sneakiest one, because vanilla Minecraft simply ignores the mods folder. Fix the one that applies and relaunch the Forge profile.
The Forge installer will not open (Java). Your PC has no Java runtime, or .jar files are associated with the wrong program. Install Java from java.com and try again. If it still sulks, right-click the installer → Open with → Java. Do not go looking for a “fixed” installer on another website — that is exactly how the fake ones spread.
Black screen after starting Minecraft (Bedrock). Restart the game first; clear Minecraft’s cache in your phone’s app settings second. Still black? Remove other add-ons and test this one alone in a fresh world. If it is still broken with everything else removed, the add-on file itself is probably broken — that happens with fan projects, and it is not your fault.
The add-on imported, but nothing appears in-game (Bedrock). The packs are not active in this world, or experimental features are off in this world. Both are set per world, so a working setup in your test world proves nothing about your main world. Open that world’s settings and check all three: resource pack on, behaviour pack on, experiments on.
A character from a guide is missing (both routes). Your build probably does not include her. The 1.19.2 and 1.20.1 community ports contain less than the 1.12.2 original, and Bedrock add-ons contain less still. Our Characters page shows which characters exist in which build, so you can check before you troubleshoot a character who was never there.
How to Uninstall — and How Updating Works
Removing the mod is easier than installing it, on both routes. On Java, close the game, open your mods folder, and delete (or just move out) the Jenny Mod .jar. Next launch, the mod is simply gone — Forge loads whatever is in the folder, nothing more.
One honest warning for both routes: anything the mod added — companions, items, eggs — disappears from worlds where you used it. Do not uninstall mid-adventure in a world you love and expect it to look untouched. Back up first if the world matters.
On Bedrock, edit the world (pencil icon), open the pack lists, and deactivate the add-on’s behaviour and resource packs. To remove the files from the phone entirely, go to Minecraft’s Settings → Storage and delete the packs there. The world itself keeps existing; it just runs vanilla again.
Updating works by replacement, not by patches. On Java, when a newer build of the same version line appears, swap the old .jar in your mods folder for the new one. Never leave two versions of the mod in the folder at once, because Forge will try to load both and complain. And version-matching never relaxes: a build made for 1.12.2 will never run on 1.20.1, no matter how new it is. On Bedrock, importing a newer add-on file usually overwrites the older pack; if an add-on breaks after a Minecraft update, that is the fix to try first.
You Are Installed — Now What?
If Jenny is standing in your test world, you are done: the mod works, and everything else is playing the game. Pick your version on the Download page if you still need the file, meet the full cast on the Characters page, and head back to the homepage for the rest of our Jenny Mod coverage. Good luck in there — she is better company than a wolf.
Frequently Asked Questions
Here are the common questions about how to install jenny mod, with short answers for PC and Android.